
DIY Beeswax Gifts: Lip balm, Candles, and Beeswax Wraps!
- learobertnicoud
- Nov 18, 2020
- 6 min read
Updated: Dec 12, 2020
Making homemade crafts with pure Canadian beeswax is the perfect opportunity to spend time with family at home and make thoughtful, homemade, all-natural gifts for friends and family. An added bonus? Your house will smell amazing, as the aroma of melting beeswax fills the air! Learn a little bit about beeswax and how to make these lovely beeswax crafts.

Benefits of Beeswax
Beeswax is an all-natural alternative to paraffin and soy-based waxes and it burns cleaner. There's no need to add scents: the warm, earthy, honey scent comes naturally to beeswax. Beeswax is also the perfect base for lip balm and skin salves. When combined with natural oils, it helps keep skin soft, by creating a protective barrier that helps keep moisture in. This makes it really helpful in preventing chapped lips and skin during our cold winters (and from all alcohol hand sanitizers we've been using lately). You can even ditch plastic food wrap, by make an alternative beeswax wrap!
Below you will find a few of our favourite things to make with beeswax.
How is Beeswax Made?
Honey bees have a special gland on the bottom of their abdomens that create wax. For bees to make 1 kg of wax, they need to eat about 7 to 9 kg of honey. Honey bees use their beeswax to build hexagon cells which they use to store honey and for the queen to lay her eggs. Once the bees have removed most of the water content in the nectar, creating honey, they cap the cells with their beeswax. When we harvest honey, we remove these wax cappings, rinse the wax cappings to remove any debris, and then we melt and filter it. We then mold the wax, ready to be used!
1. How to Make Beeswax Lip Balm
In our previous blog post, we share our not-so-secret recipe for beeswax lipbalm. All you need is beeswax, coconut oil, vitamin E, and if you'd like to add scent, the essential oil of your choice.

What You'll Need:

Makes six (6) 0.5 oz lip balms
60g coconut oil (approx 4 Tbsp + 1 tsp)
A couple drops Vitamin E oil (optional)
A couple drops of mint essential oil (optional). You can also try orange essential oil, grapefruit essential oil, or the essential oil of your choice.
A small glass measuring cup
A pot of hot water
6 x 0.5 oz lip balm tins, tubes, or containers of your choice

Instructions to make beeswax lip balm
Place the beeswax in your glass measuring cup, and set it in a pot of water on the stove. Bring the water to a boil to completely melt the beeswax.
Add the coconut oil, vitamin E (if using), and essential oil (if using) and once melted, stir to combine.
Pour carefully into 0.5 oz lip balm containers (available here) or lip balm tubes. Let cool completely
For hand salve, you can modify this recipe to include a little more coconut oil or substitute some coconut oil for olive oil.
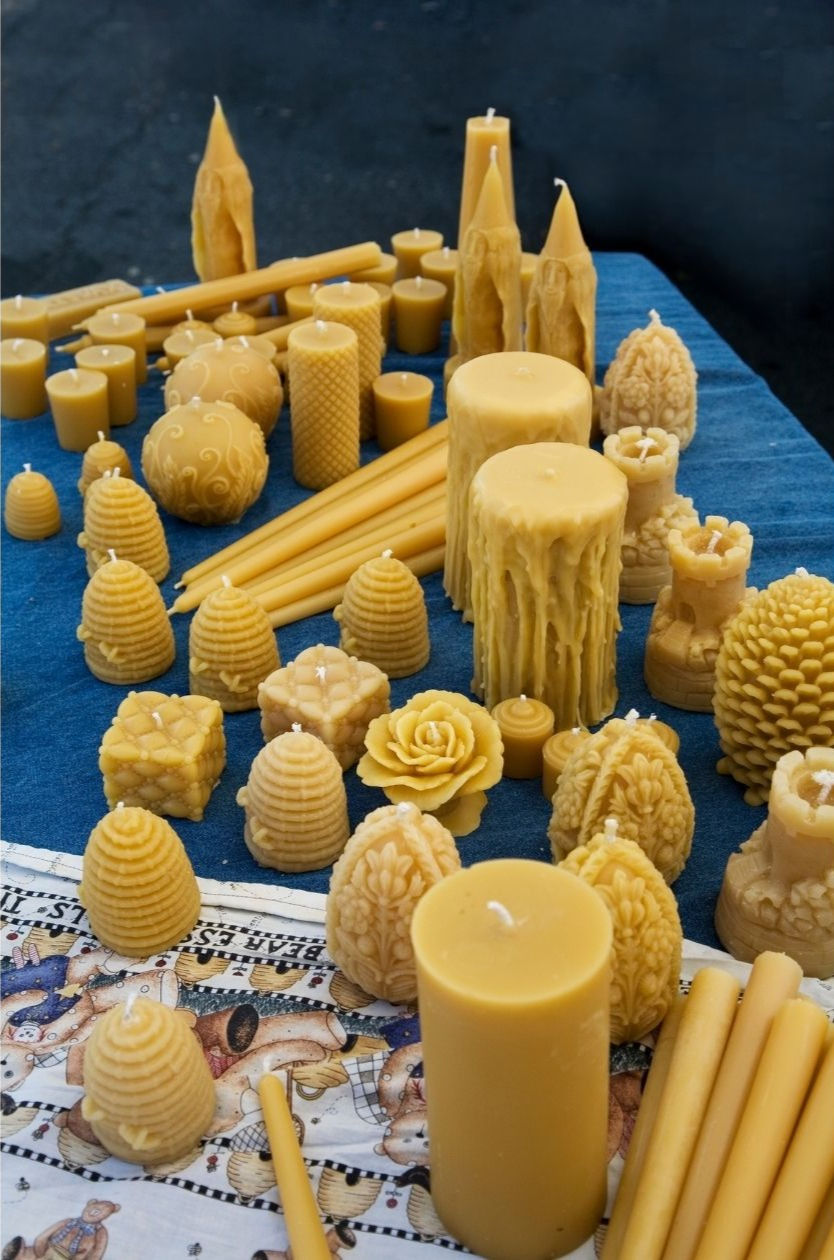
2. How to make Beeswax Candles

Beeswax candles burn cleaner than soy-based or paraffin based candles, with a clean warm earthy honey scent that comes naturally to beeswax. In our house, they help brighten the long winter evenings and have a special place at our table at Christmas. Our favourite candle - our signature diamond beeswax candle - is available through our online store. If you'd like to make your own, here are some tips and instructions to help you:
What You'll Need to make beeswax candles:
Beeswax
Square braid cotton wicks - size of the wick depends on the diameter of the candle
Candle mold - We prefer silicon candle molds because they are easiest to work with
Beeswax candles burn best as a free standing candle
Choosing the right wick
I'm not going to lie, this part is hard. If the wick is too small, the flame will tunnel down the middle of the candle, melting very little wax, and starving out the flame. On the other hand, if the wick is too big, the flame will melt too much wax, and drown it out. The ideal wick will create an even pool of wax that melts all the way across the candle. This is why, when it comes to beeswax candles, it is best to let them burn for the evening (i.e. a few hours) to allow the wax pool to melt all the way across, rather than a short period of time that will encourage a narrow well down the centre of the candle.
The easiest solution to selecting the right wick is to buy a candle mold that specifies what wick size to use. This article from Bee Culture Magazine fully explains how to choose the right wick size and how to experiment to find the right one.

Melting the beeswax
In addition to the wick, there is also an art to melting the wax...and it comes down to temperature. You will want to melt the wax to the point that it is just melted. If the wax is too hot it can cause cracks in the resulting candle. It should be just hot enough that it is melted and when poured, quickly starts to harden on the top.
Select an old pot for melting your wax. It is very hard/impossible to remove beeswax from the pot when you are finished. You can check out the local thrift shop or garage sales for a suitable pot that you don't care to ruin and it can become your candle making pot. We like to use a pot that has a lip to making pouring a little easier.
Placing the wick and pouring the beeswax.
Now that you've selected the right wick and melted the beeswax, it's time to make the candle. Cover the counter or table with newspaper so that any spilt wax can be easily cleaned up.
Dip the wick in the melted beeswax, making sure to keep your fingers away from the hot wax (it can result in serious burns, so be careful). Hang the wick or lay it flat to allow it to dry straight.
You can string the wick through the mold, securing it at the top with a clothes pin or wrapping it around a pencil, laid flat across the top.
Gently pour in the wax into the mold and leave to cool. The time it takes to cool depends on the size of the candle. Smaller candles will be ready faster. Larger ones will take longer to set. Don't make the mistake of removing the candle from the mold too early...the outside may be hard, but the inside may still be molten wax.
Making beeswax candles is a labour of love.
Once you've got the right wick and mold, wax at the right temperature, and you get the hang of pouring the wax, candle making is really satisfying. The process makes the house (or in our case the workshop) smell amazing. And the result is a beautiful, all-natural gift that is sure to brighten the holidays. Not looking to make your own? We also sell beeswax candles.
3. How to make Beeswax Food Wrap
What are beeswax food wraps? They're a reusable alternative to plastic wrap, that can be used to cover bowls, wrap sandwiches and snacks, etc. They can be washed with cold water and a mild soap and are great for items like cheese, vegetables, fruits, nuts, sandwiches, etc. that can be wrapped up. It is not recommended to use hot water (because beeswax melts), so they are not recommended for meat.
Most DIY beeswax food wrap instructions we've read call for just beeswax melted on cotton fabric. In our experience, however, wraps made with just beeswax aren't pliable and sticky enough for use in the kitchen. The secret ingredients are jojoba oil and pine resin.

The recipe we have used with success comes from MommyPotamus. The author recommends using beeswax pellets, but we had success melting a chunk of beeswax with the jojoba oil and pine resin in an old pot (use an old one....beeswax and resin are not coming off) and painting the mixture onto the cotton sheets with a cheap paint brush (the brush will be ruined so don't use a good one).
Note: this is a messy project. Cover your counters - melted beeswax and pine resin are very sticky and when cooled are very hard to get off counters. Take it from my experience, lol :D
Here is the full recipe: https://mommypotamus.com/diy-reusable-food-wrap/
Featured Products - Pure Canadian Beeswax
1 oz Beeswax Medallion
We hand-pour these 30g/1oz pure beeswax medallions. Their small size makes them easy to use in recipes for homemade lip balm, salves, beeswax wraps, charcuterie board polish, and more. Shop Now
$2.00 per medallion

8 oz Beeswax Blocks
For larger projects, our 8 oz blocks are great!
$9.99 / 8 oz block

Diamond Pillar Candle - 100% Pure Canadian Beeswax
We handmake our diamond pillar beeswax candles!
Burn time: 70+ Hours
Candle size: 5" h x 2 3/4" d
Environmentally-friendly ingredients: 100% pure Canadian beeswax and cotton wick
Burns cleaner, longer and brighter than synthetic or soy-based candles
$28.99
More from the Blog


